
Safe. Fast. Affordable.
You can get payday loans for up to $1500 in as little as 15 minutes! My Canada Payday is in the business of getting you your fast cash advance now!
How to Download Your Last 180 Days of Bank Transactions (Android Phone)
If you are using an Android phone, follow the steps below to log into your online banking, switch to the desktop version of the website, and save your last 180 days of transactions as a PDF.
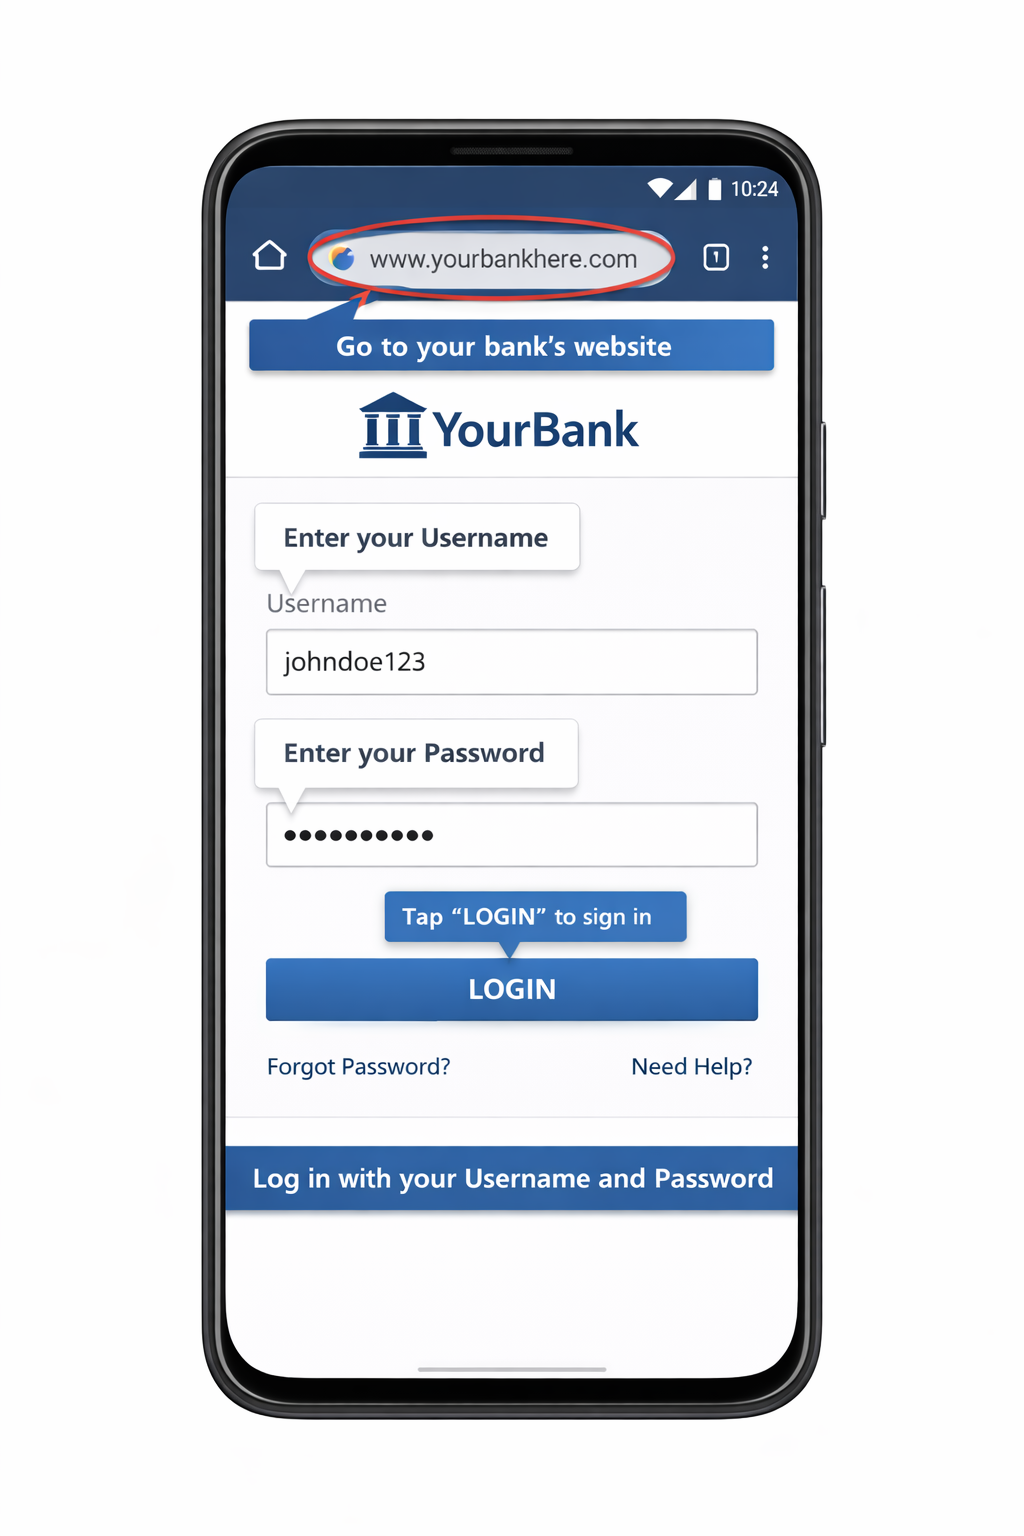
Step 1: Open Chrome and Log Into Online Banking
- Open the Google Chrome browser on your Android phone.
- Go to your bank’s website (do not use the banking app).
- Log into your online banking using your username and password.
If your bank tries to open the mobile app, stay in Chrome and continue to the next step.
Step 2: Switch to Desktop Version
- Tap the three dots (⋮) in the top right corner of Chrome.
- Select Desktop site from the menu.
- The page will refresh and show the full desktop version.
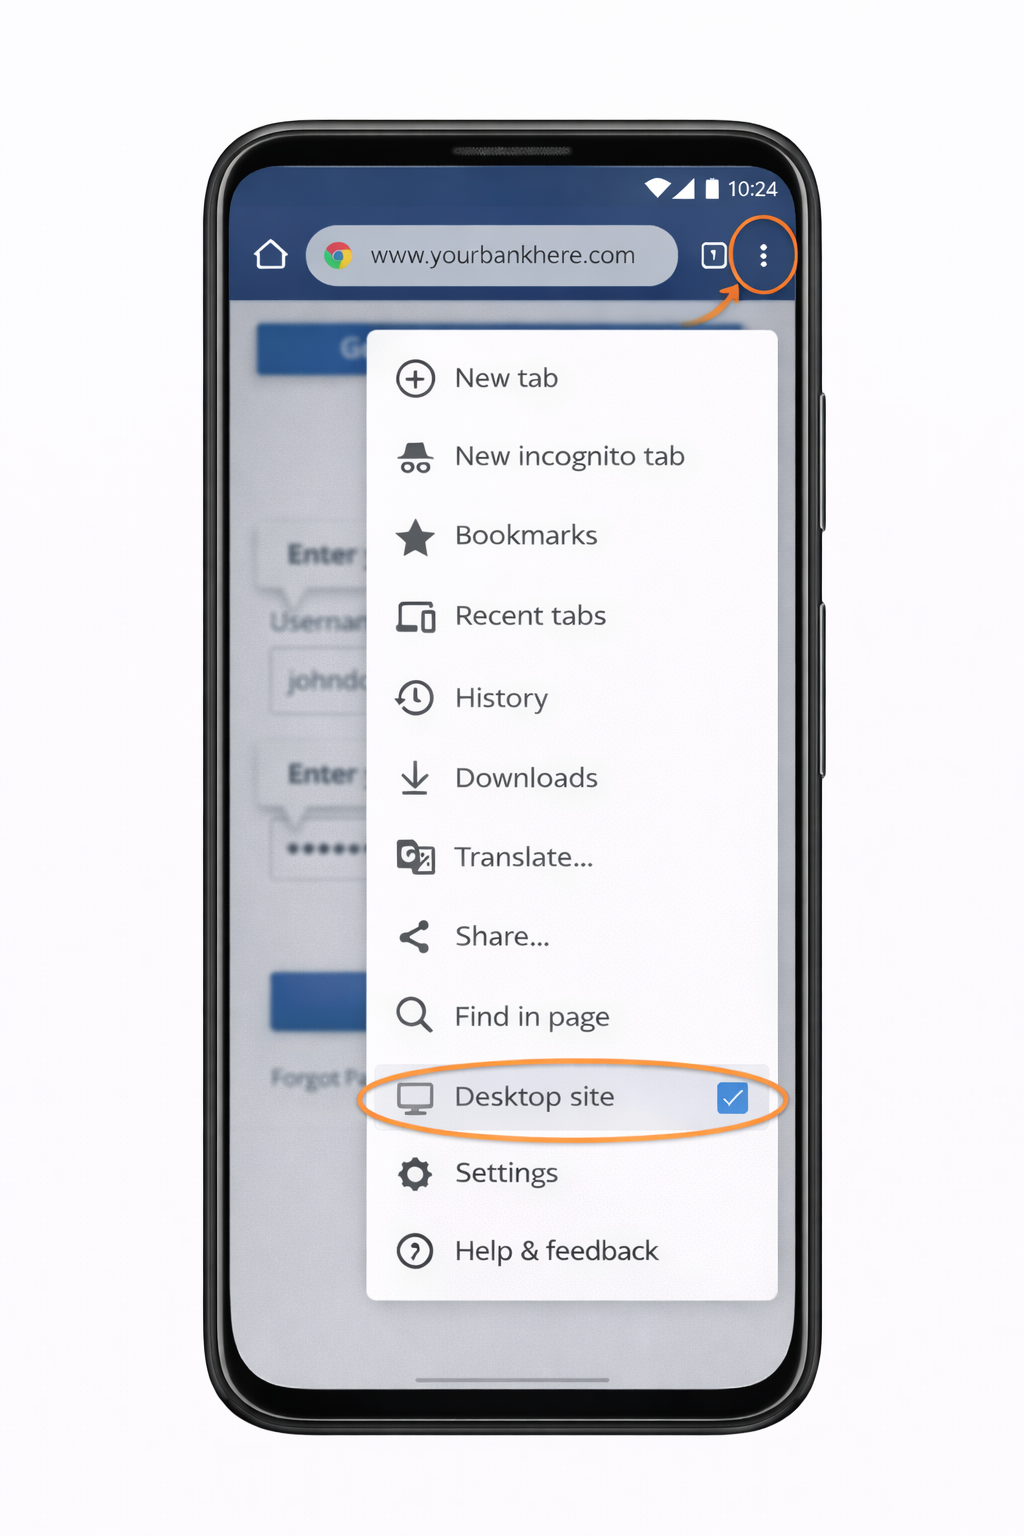
The desktop version is required because many banks do not show full transaction or print options on the mobile version.
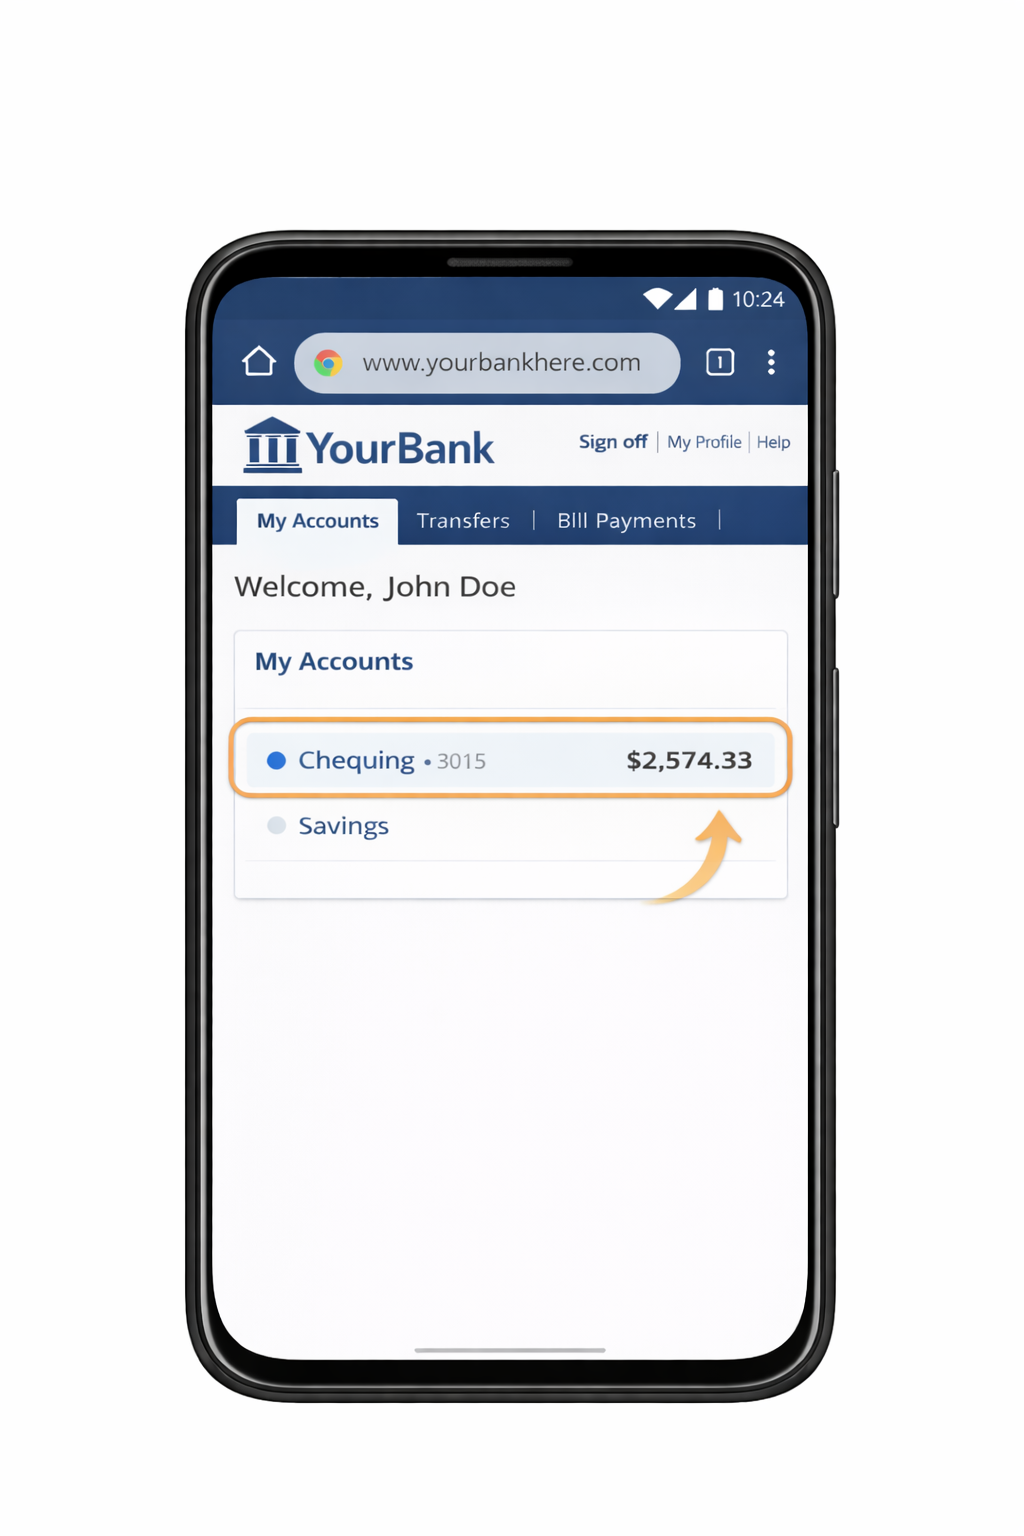
Step 3: Open Your Transactions
- Select the correct account (for example, Chequing or Savings).
- Click on Transactions or Account Activity.
Step 4: Set the Date Range to 180 Days
- Look for a Filter, Search, or Date Range option.
- Set the start date to 180 days ago.
- Set the end date to Today.
- Click Apply or Search.
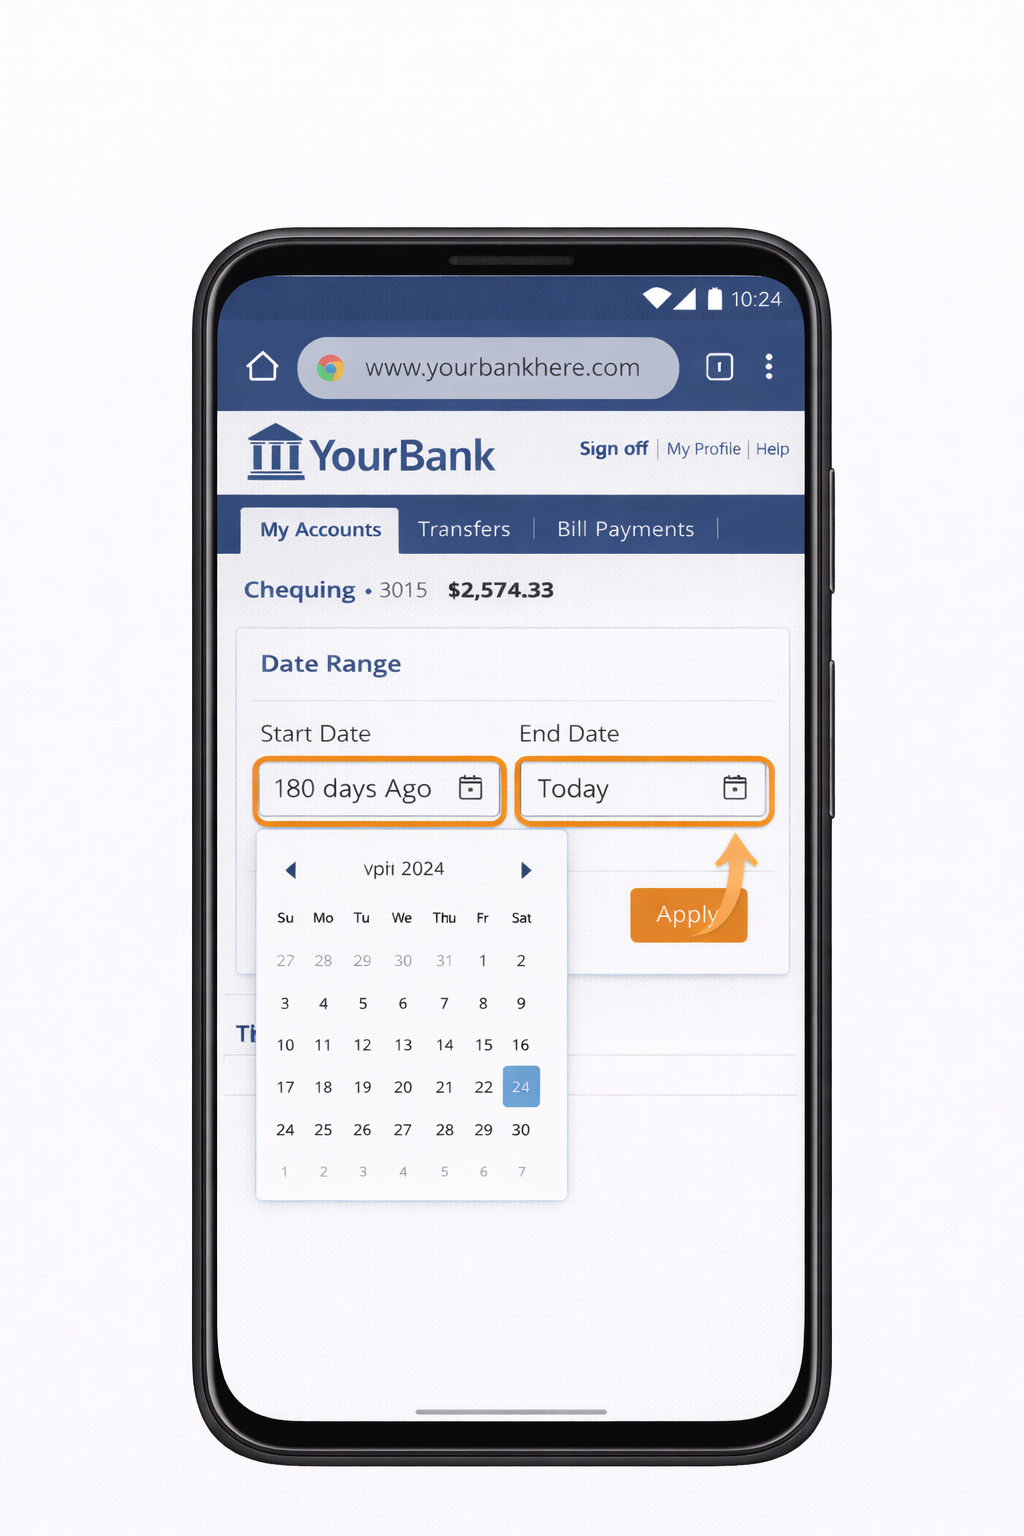
If the system does not allow 180 days at once, select the maximum available range and repeat the process in sections until you cover the full 180 days.
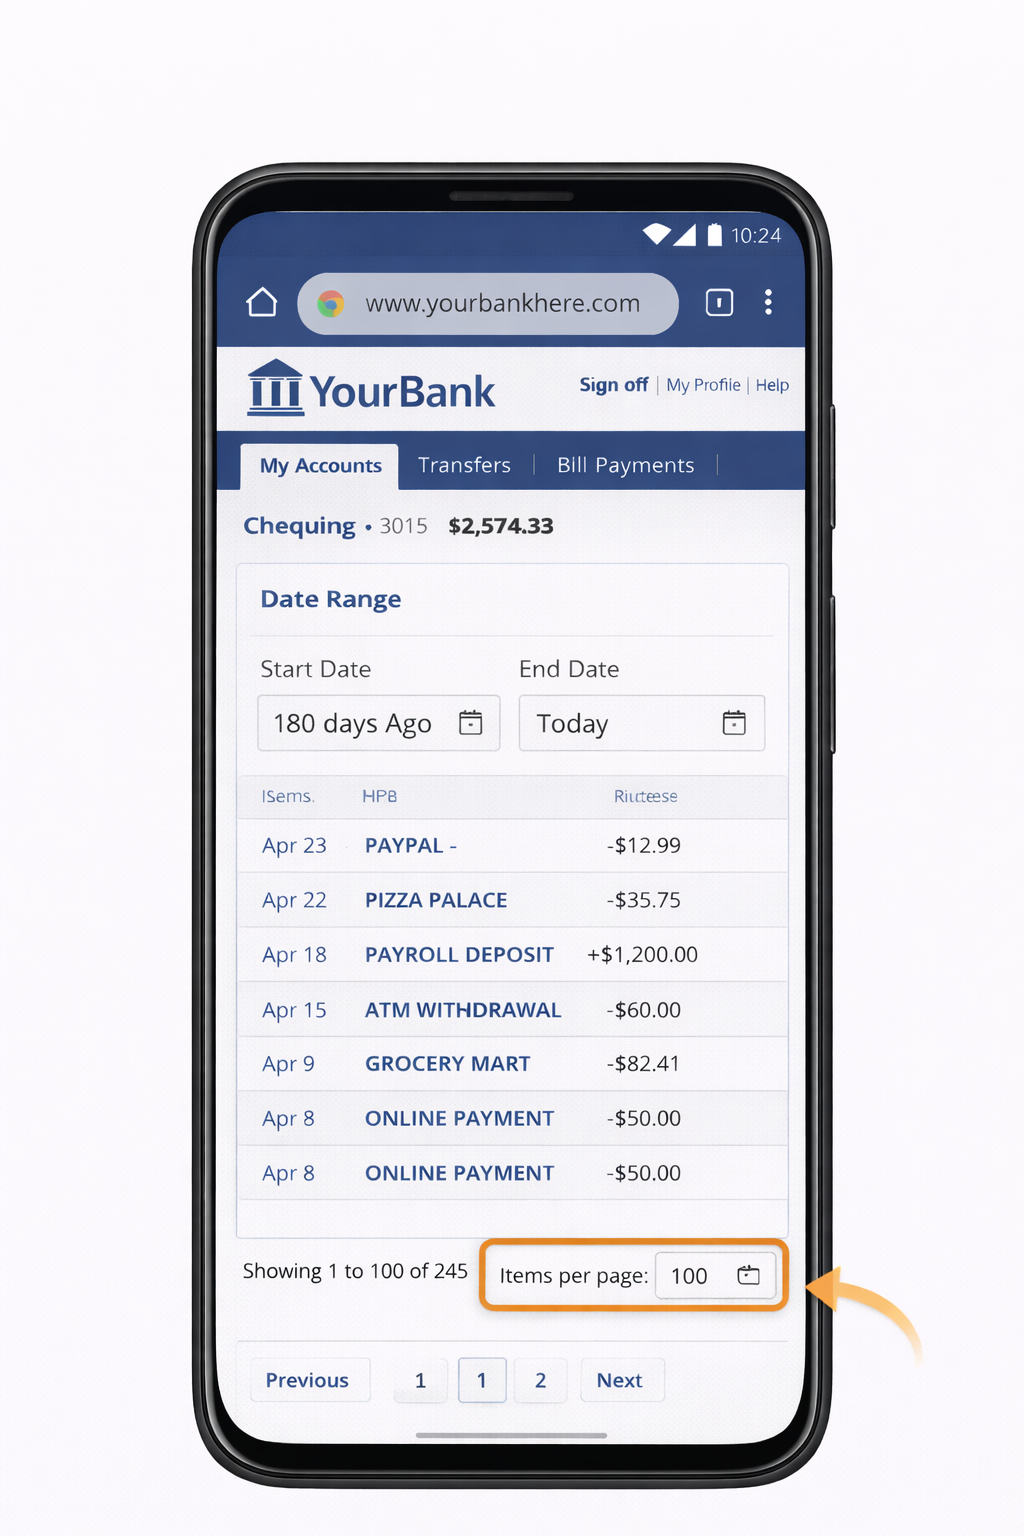
Step 5: Show the Maximum Number of Transactions
- Look for Items per page or Transactions per page.
- Select the highest number available (often 100).
- Confirm that the page updates and displays more transactions.
Step 6: Turn Your Phone to Landscape Mode
- Rotate your Android phone sideways (landscape mode).
- Make sure the full transaction table fits properly across the screen.
- If needed, zoom out slightly so all columns are visible.
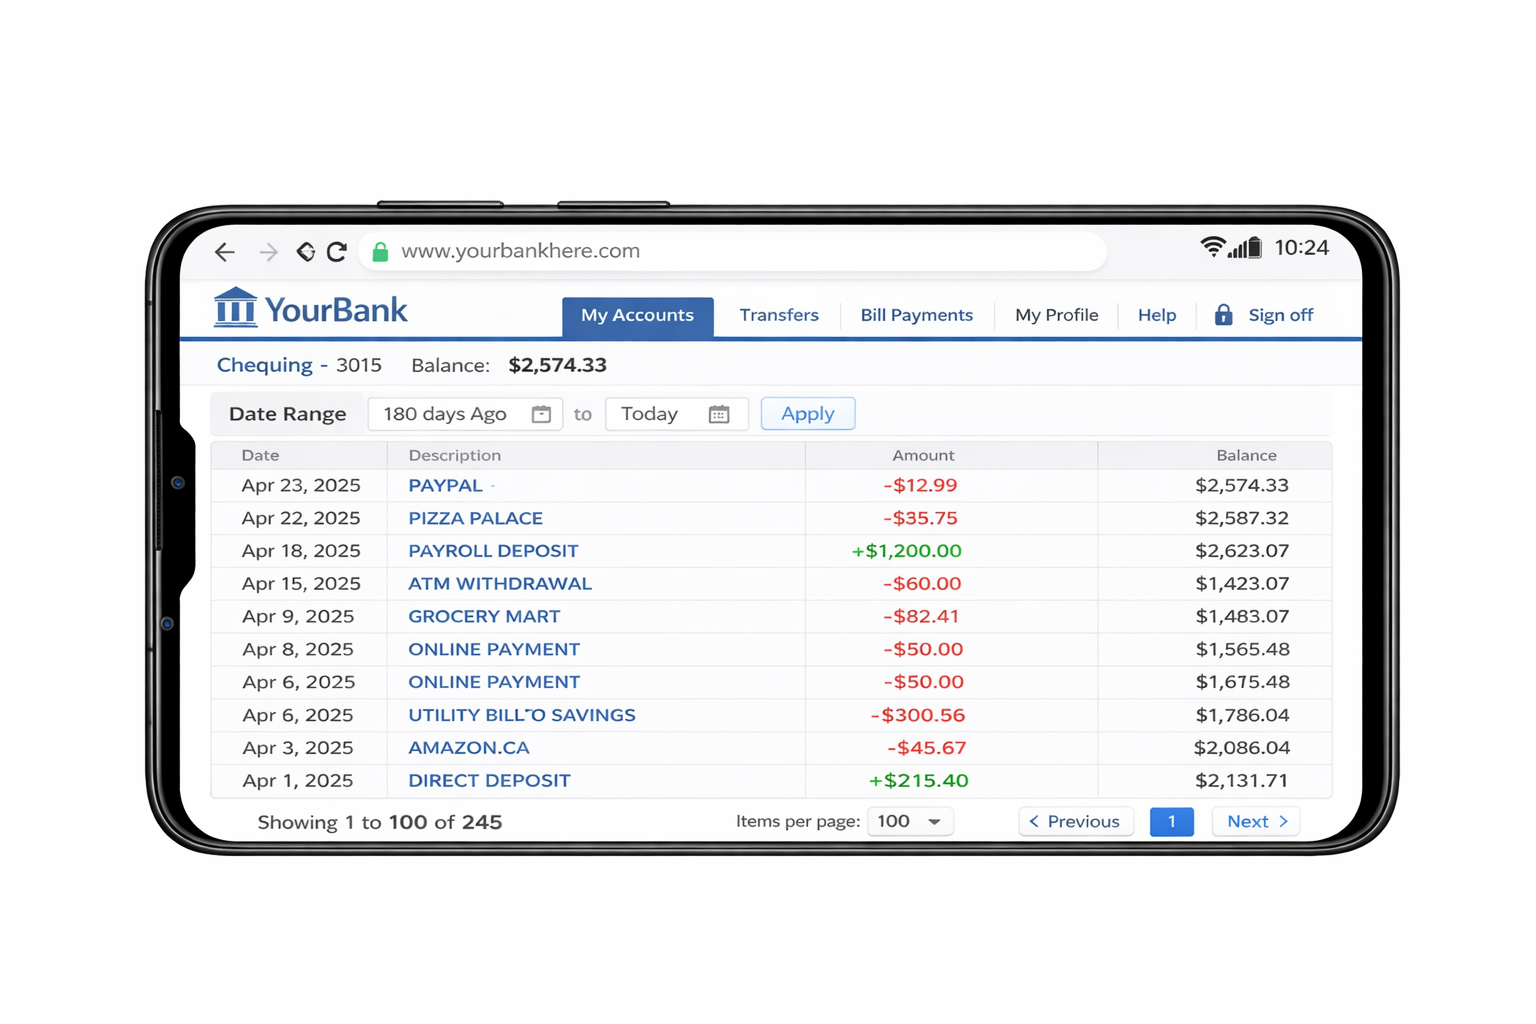
Landscape mode helps ensure all transaction columns (including amounts and balances) are fully visible before saving the PDF.
Step 7: Print and Save as PDF
- Click the Print option on the page (usually near the top).
- When the print screen appears, change the printer selection to Save as PDF.
- Tap the download/save button.
- Save the file to your phone.
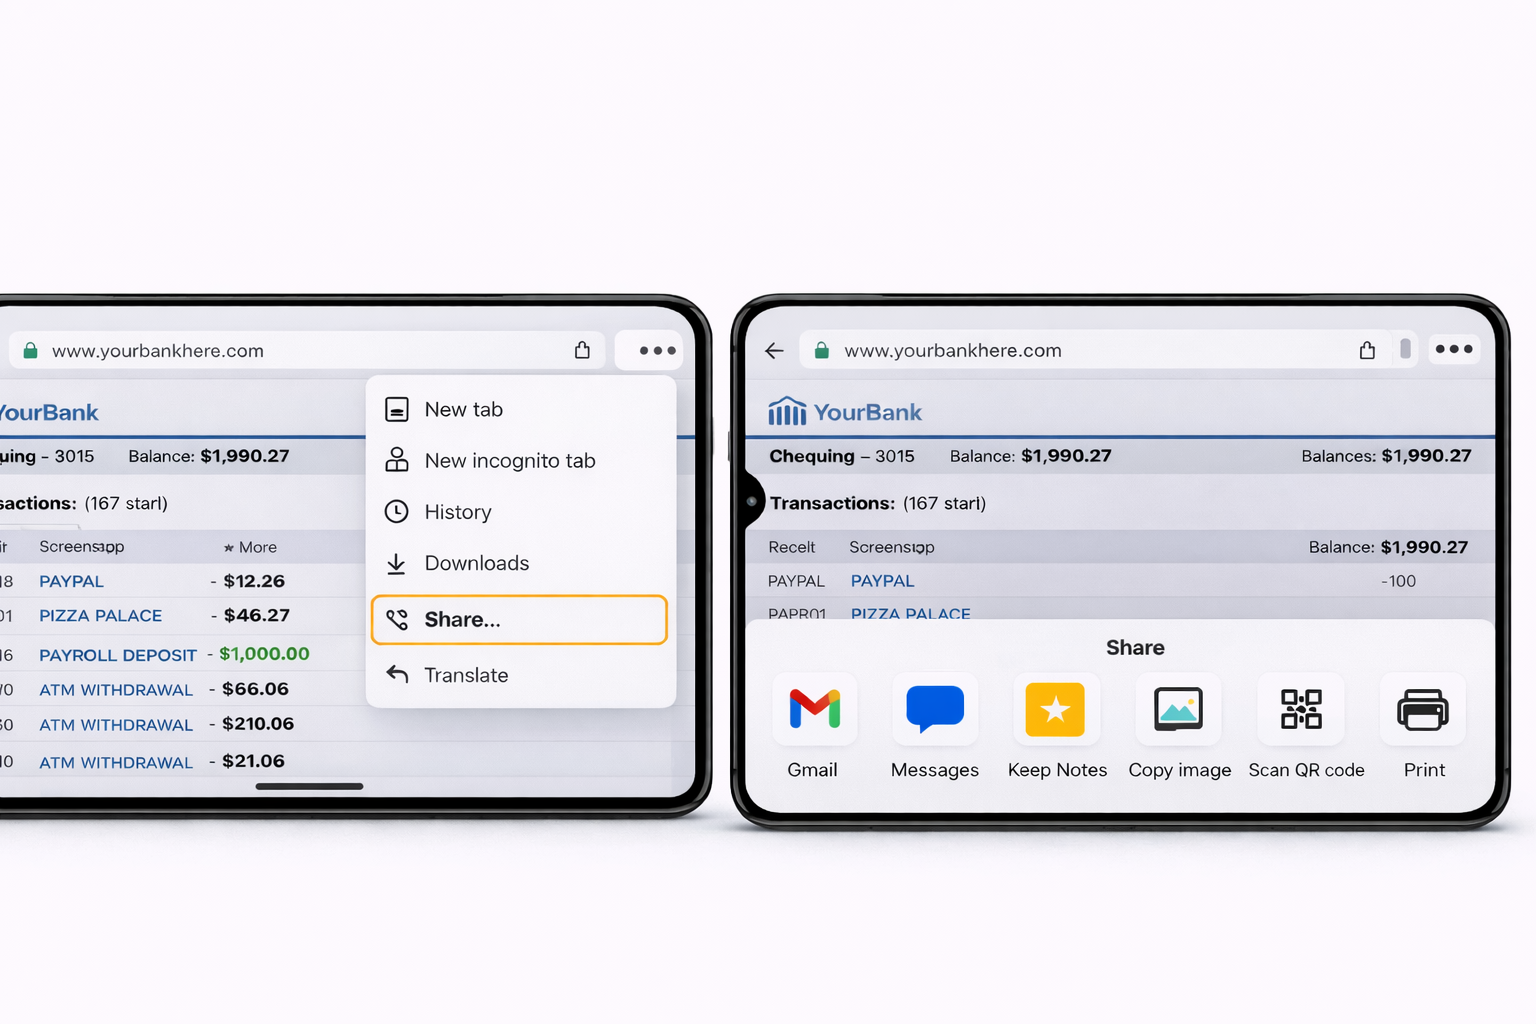
If there is no Print button on the bank page, tap the three dots (⋮) in Chrome, choose Share or Print, and then select Save as PDF.
If You Need Multiple PDFs
Some banks limit the number of transactions shown at one time. If all 180 days are not included, adjust the date range and repeat the steps until you have saved the full 180 days of activity.