
Safe. Fast. Affordable.
You can get payday loans for up to $1500 in as little as 15 minutes! My Canada Payday is in the business of getting you your fast cash advance now!
How to View & Save Your Bank Transactions on an iPhone
This guide explains how to view your full banking transactions using the desktop version of your bank’s website on an iPhone, and how to save your transactions as a PDF.
Step 1: Log in Using Safari
- Open Safari on your iPhone
- Go to your bank’s website
- Tap Sign In or Online Banking
- Enter your login details
- Complete any verification steps if prompted
- If it tries to open the mobile app, choose “Cancel” or “Stay in Browser.”
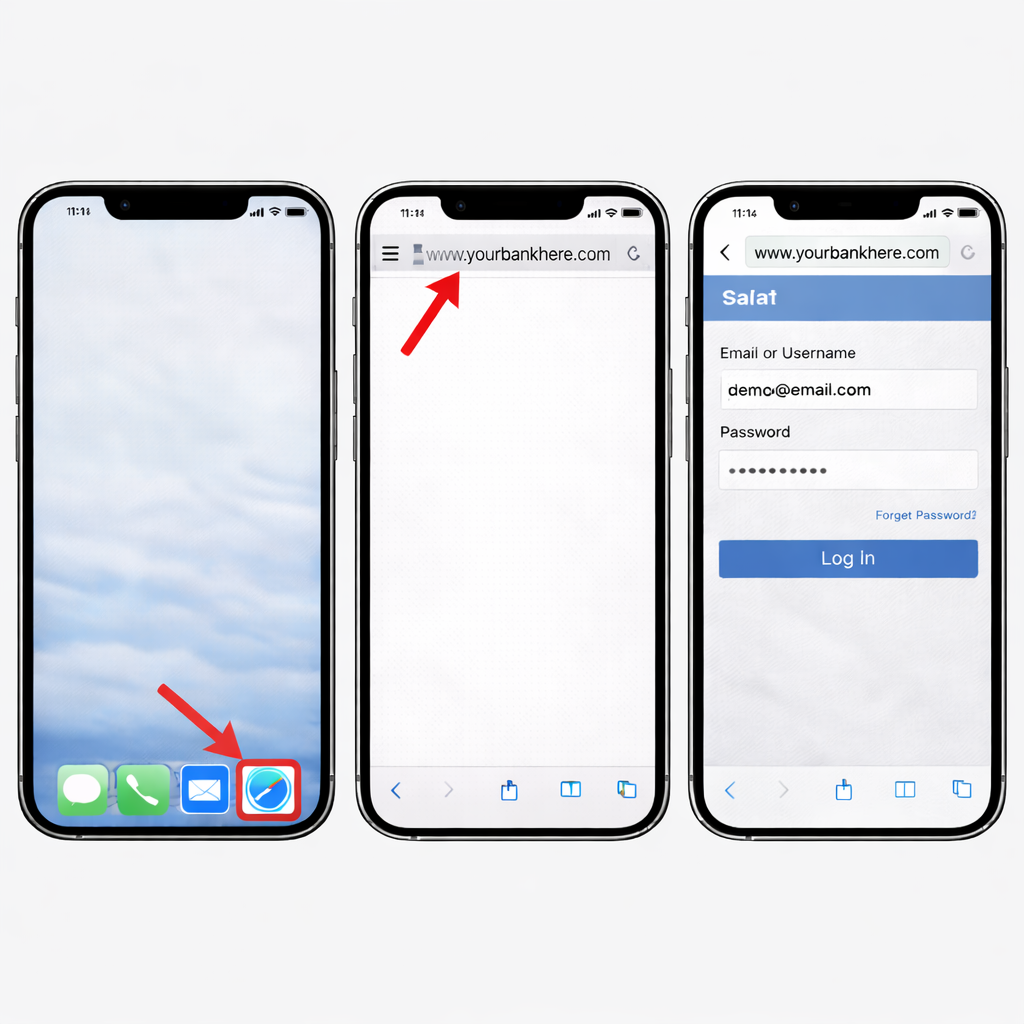
Log in to your online banking using Safari
📱 Important: This must be done in Safari — not inside your bank’s mobile app.
Step 2: View Transactions of Your Payroll Account
- Navigate to Accounts, Transactions, or Activity
- Select the account your payroll is deposited into (e.g., chequing or savings)
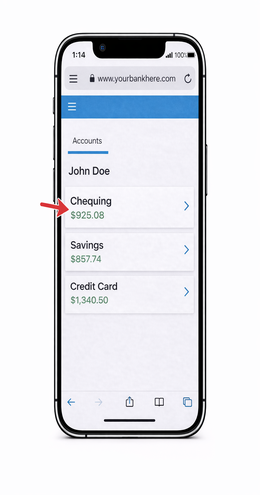
Select Payroll Account
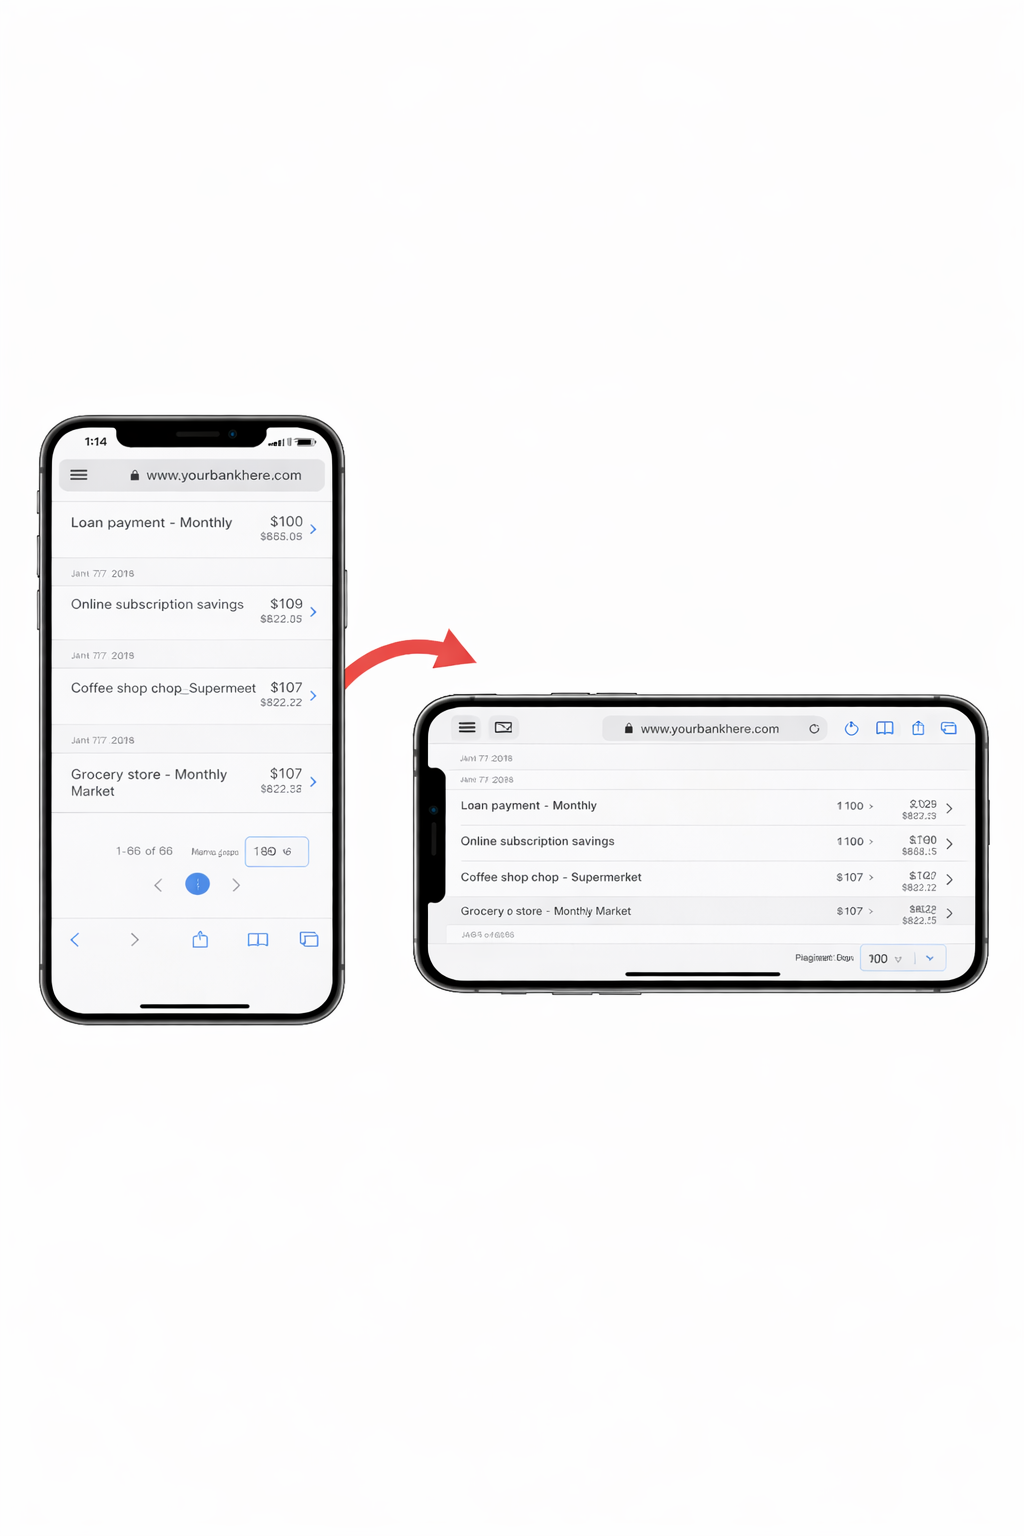
Step 3: Switch to Desktop Website View
Mobile views often hide transaction filters and print options. Switching to desktop view makes these visible.
- While logged in, tap the icon on the far left of the Safari address bar
- Select Request Desktop Website
- The page will reload in desktop view
👆 Look for the “aA” icon or the Text & page settings icon in the left side of the address bar.
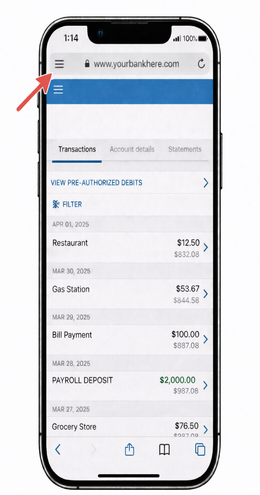
Screenshot: Requesting the desktop website in Safari
Step 4: Filter Transactions for 180 Days
- Find the Date Range or Filter section
- Set:
- Start Date: 180 days ago
- End Date: Today
- Tap Filter, Search, or Apply
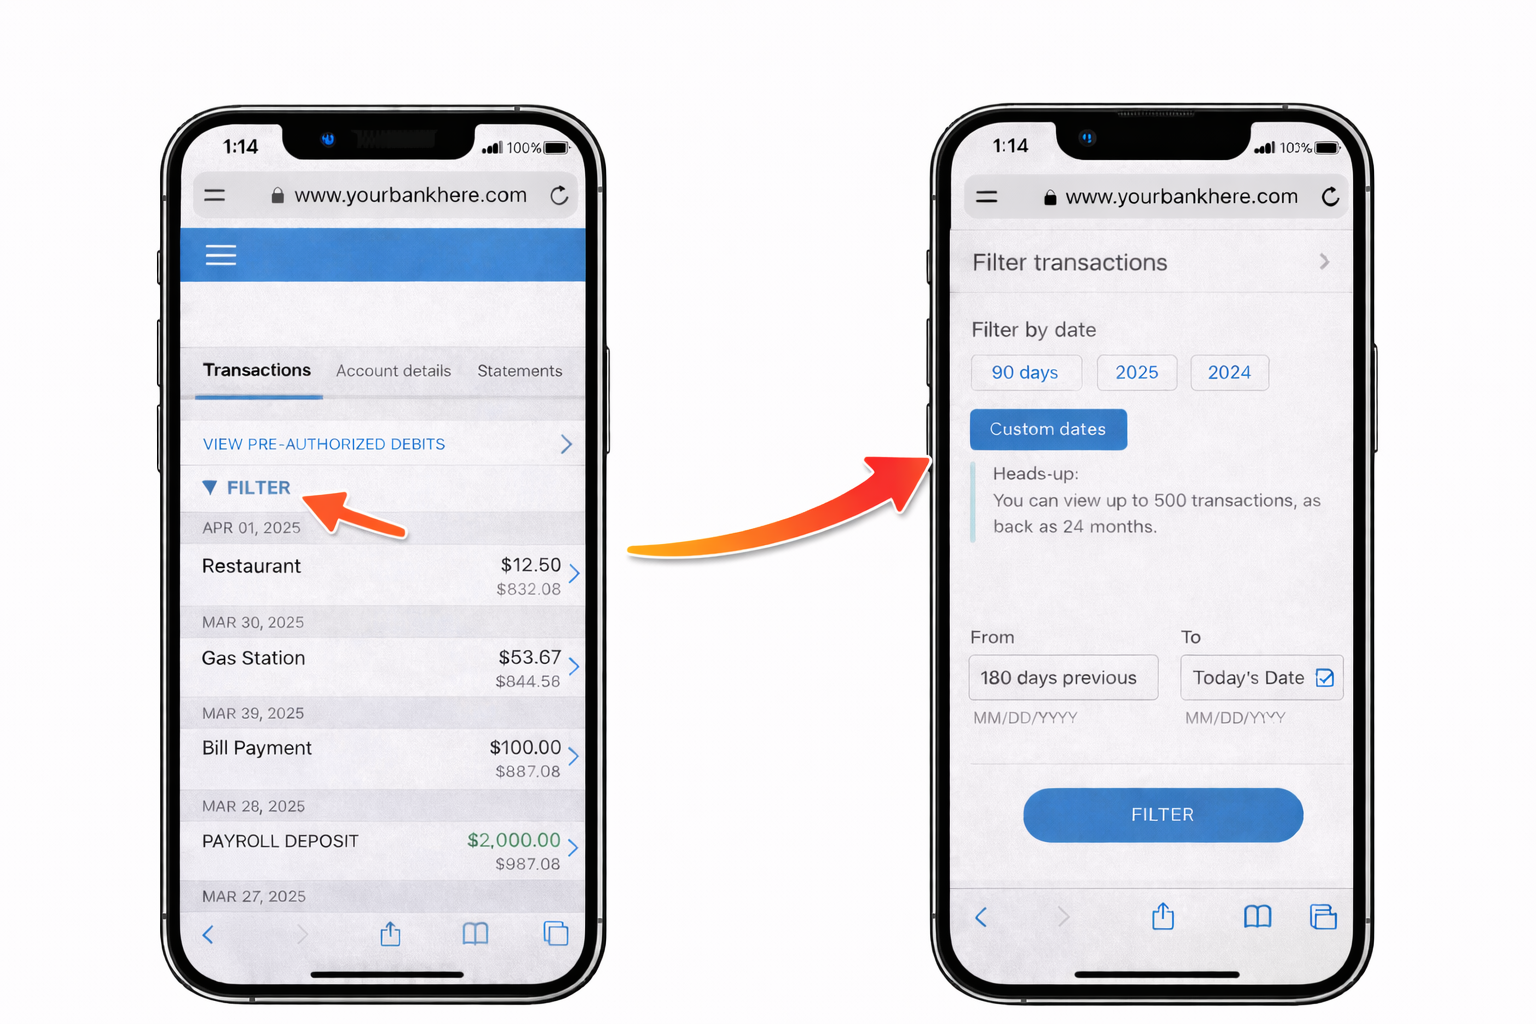
Screenshot: Selecting a 180-day date range
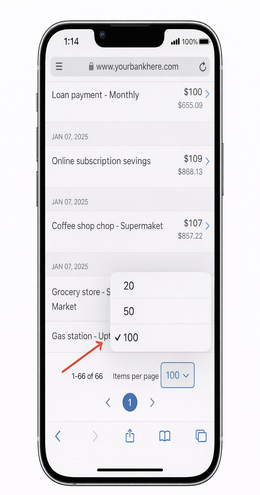
Step 5: Increase Transactions Per Page
- Locate Transactions per page
- Select 100 or the maximum available
- Apply or refresh if needed
✅ This ensures all transactions appear before printing.
Screenshot: Increasing transactions per page
Step 6: Rotate Your Phone (Recommended)
- Rotate your iPhone to landscape mode
- If it does not rotate, turn off Portrait Orientation Lock in Control Center
- For more information on how to rotate the screen on your iPhone, Click Here
💡 Landscape mode makes desktop menus and the print button easier to see.
Screenshot: Viewing the desktop site in landscape mode
Step 7: Print and Save as a PDF
- Tap the Share near the top of the page
- Scroll down until you see and tap on Print
- Tap on the Share icon again
- Choose a folder and tap Save
🖨️ You can also click on 'print' or the printer icon if it is visible on the page desktop view.
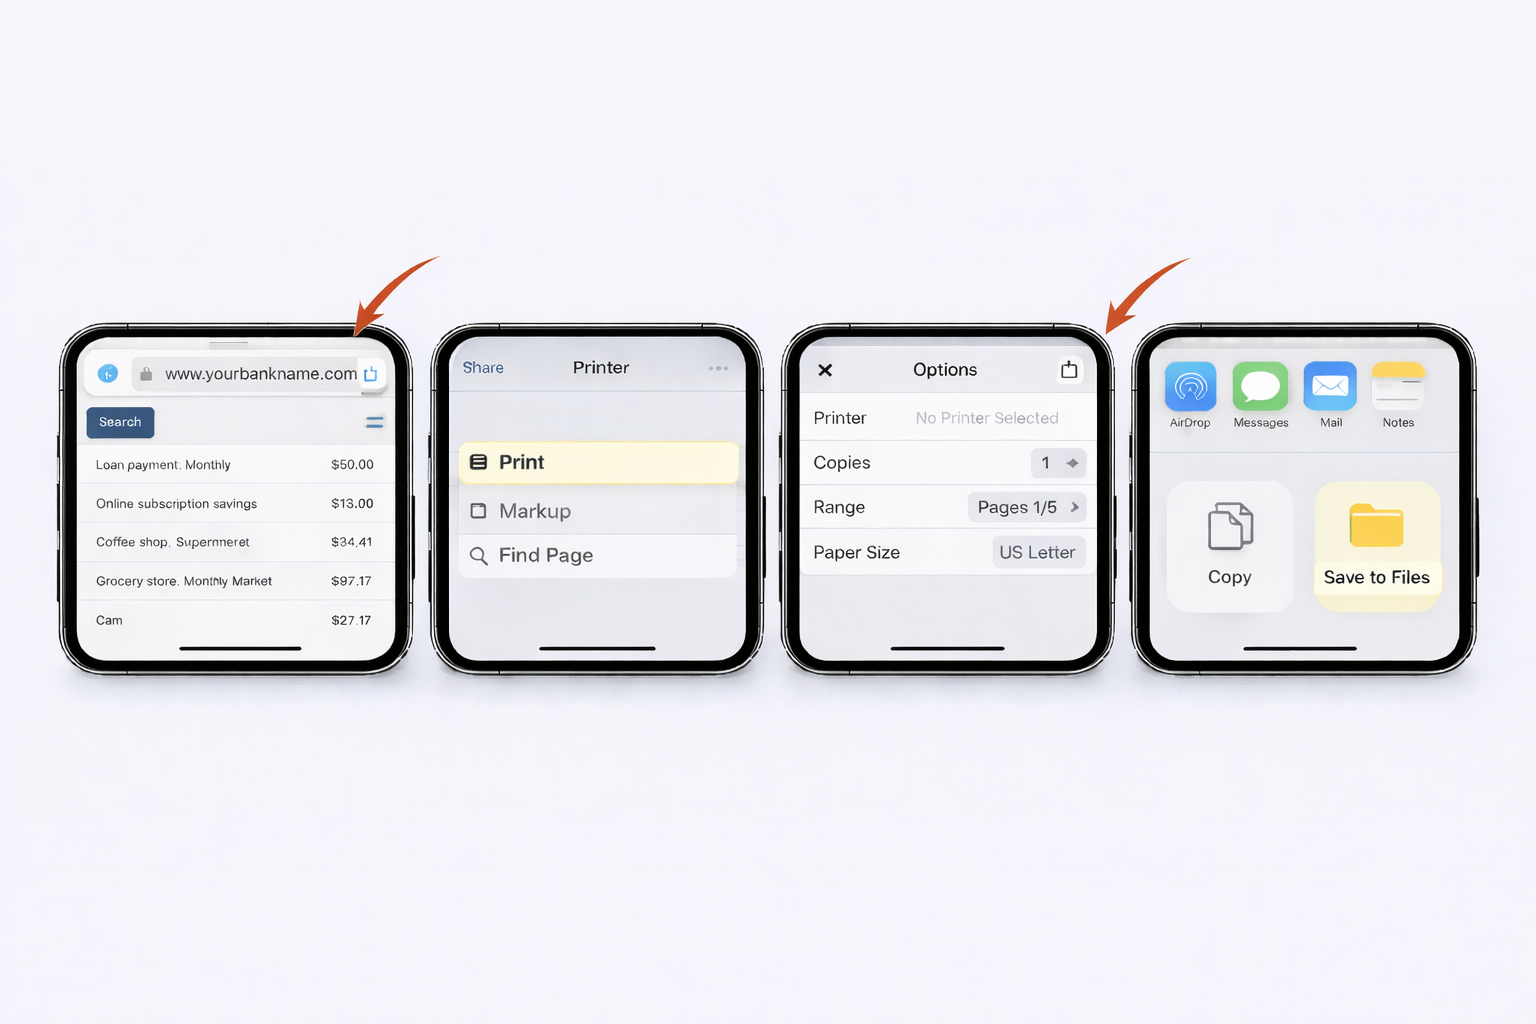
Screenshot: Printing and saving as a PDF
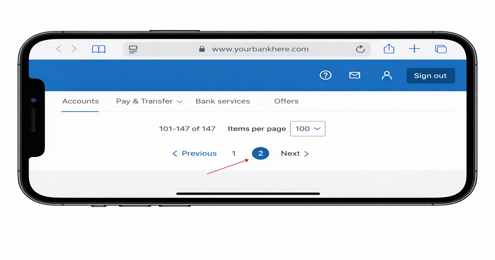
Step 8: Repeat for Additional Pages
If your transactions span multiple pages, repeat the print process for each page to capture the full 180-day period.
Common Issues & Tips
- Missing transactions? Increase transactions per page or check additional pages.
- Using a bank app? Switch to Safari instead.